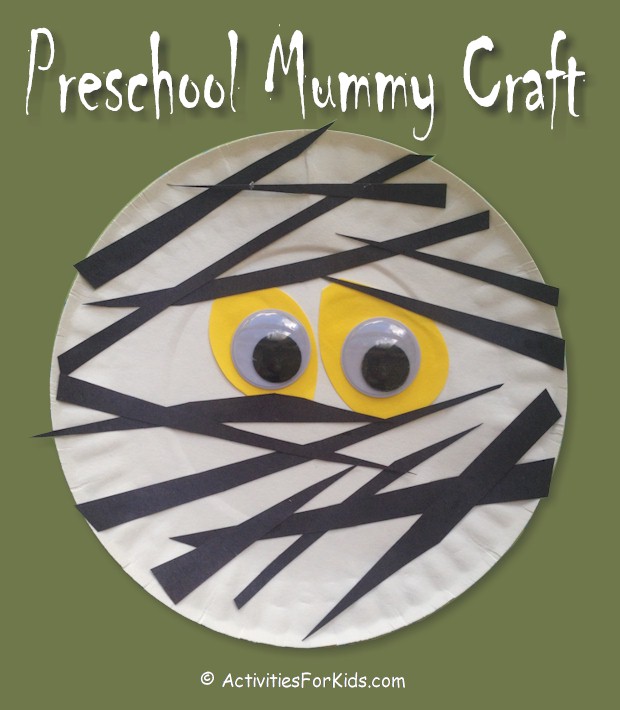
This Paper Plate Mummy Craft is a super simple, last-minute craft for pre-school children. Imagine, it’s the end of the school day and there are still a few minutes until the school bell rings. Why not fill in the extra time with this easy to put together Halloween craft?

[AFK_02]
Save time by having the materials already to go, that way, kids can put a fun seasonal paper plate mummy together in about 5 minutes. Have a large zip lock bag loaded with the paper plates, black and yellow paper scraps along with google eyes.
This Halloween mummy craft is a bit of a reversal of the traditional mummy. Instead of layering white fabric or tape over the dark mummy form, use strips of black paper on the white paper plate to give the illusion of the mummy wraps. No one says you need white strips on a dark form.
How to Make a Paper Plate Mummy
- Start with a small white paper plate. I used a 6-inch plate for this example. Flatten out the paper plate by rolling the edges over a book or the edge of a desk.
- Next, cut out two ovals from yellow construction paper. No template is needed here, just have children free form an oval, circle or just about any shape they choose. Actually the more mismatched, the cuter the end result.
- Glue the two yellow circles in place on the paper plate, then glue the google eyes on top of the yellow paper.
- Cut out thin strips of black paper from leftover scraps. Using craft glue, randomly glue the black paper strips to the paper plate.
Supply List
- Small white paper plate
- Scraps of black and yellow paper
- Google eyes
- Scissors
- Craft glue
[AFK_02]
More Suggestions
- Using the same concept as the Paper Plate Mummy is this darling little Preschool Mummy.
- For a Trick-or-Treating classroom party, have children make these Mummy Bags.
- For older elementary school aged children, here is a fun mummy lesson plan.

