
If you’re looking for a meaningful, easy, and surprisingly beautiful holiday craft, this Star of David yarn craft made from a simple Styrofoam plate is a total win. It’s budget-friendly, classroom-friendly, and totally doable for kids, yet the finished piece looks like something you’d proudly hang up as décor.
All you need is a small Styrofoam plate (around 6″ works perfectly), yarn, a hole punch, a ruler, and the Star of David PDF template. Want to jazz it up? A little craft glue and glitter can turn the whole piece into a sparkly holiday ornament.
What You’ll Need
- 6″ Styrofoam plate (white works best)
- Star of David PDF (sized to match the center of your plate)
- Hole punch
- Ruler
- About 125″ of yarn
- Tape
- Scissors
- Optional: craft glue + silver glitter for a sparkly finish
Prepping the Plate
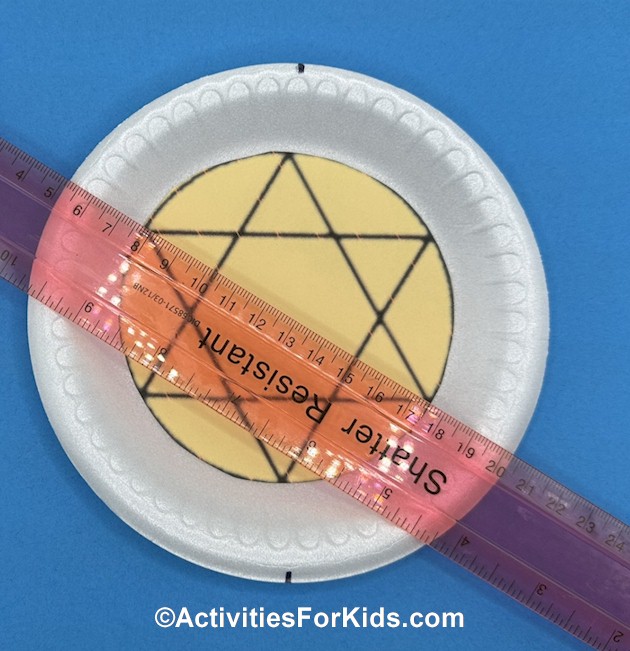
Start by choosing a Star of David PDF that roughly matches the size of the inner circle of your plate. If your PDF is a bit too small —no stress! You can adjust your placement using a ruler.
Place your ruler across the plate to connect two opposite points of the star, marking each point lightly with a pen or pencil. Continue rotating your ruler to mark all six star points evenly around the plate’s rim. These marks will guide where your yarn will anchor.
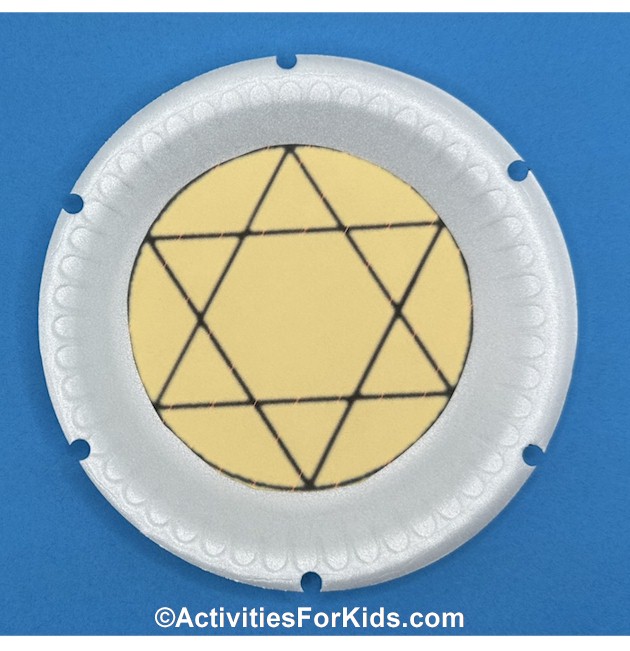
Using a hole punch, create half-holes (little notches) at each marked point. You’re not punching full holes—just notches deep enough for yarn to rest securely. If you don’t have a hole punch, just snip a ‘V’ with a pair of scissors for the 6 spots.
Cut the Yarn
Measure out about 125 inches of yarn. This gives you enough length to wrap the full shape twice for a bold, clean Star of David.
Tape one loose end to the back of the plate. You’re officially in business.

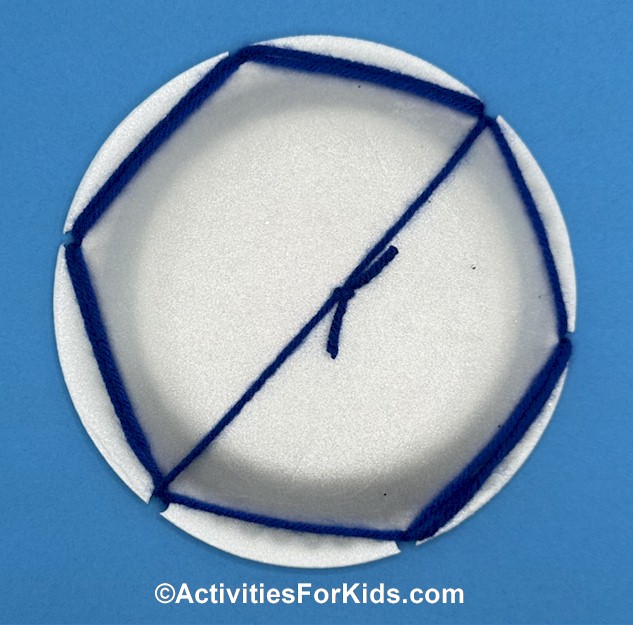
How to Weave the Star of David
For the cleanest pattern, follow the above example above with the 1 through 6 markings. This helps keep the yarn pattern organized and prevents the back from turning into a spaghetti explosion.
- Start: Bring yarn from the taped back side up through notch 1.
- 1 → 3: Stretch across the front to notch 3 (pink line). Bring yarn to the back.
- Back 3 → 4: Bring yarn behind the plate to notch 4.
- 4 → 6: Stretch across the front to notch 6 (green line).
- Back 6 → 1: On the back, move clockwise from 6 to 1.
- 1 → 5: Stretch across to 5 (blue line).
- Back 5 → 6: Move behind the plate to 6.
- 6 → 2: Stretch across to 2 (red line).
- Back 2 → 3: Move clockwise on the back.
- 3 → 5: Stretch across to 5 (yellow line).
- Back 5 → 4: Move counter-clockwise to notch 4.
- 4 → 2: Stretch across to 2 (orange line).
- Back 2 → 1: Move counter-clockwise back to 1.
Now repeat the full sequence a second time to make the star crisp and bold. Once you’re finished, tie your two yarn ends together on the back or tape them down securely.
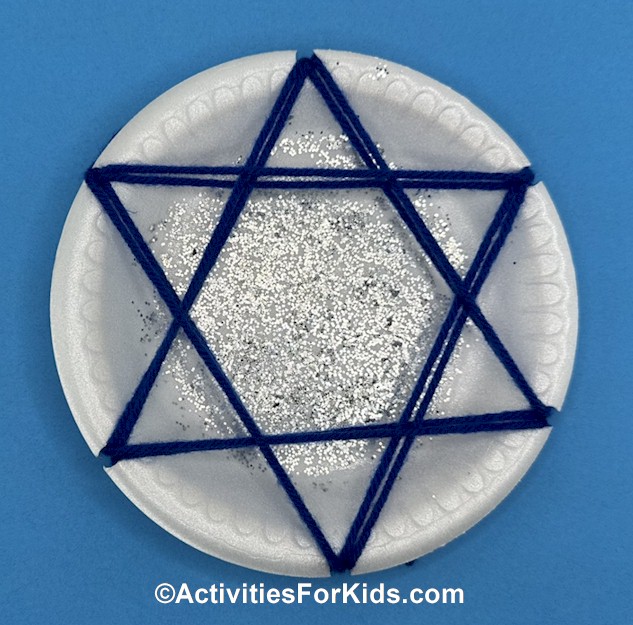
Optional: Add a Little Sparkle
If you want some holiday dazzle, brush a thin layer of diluted craft glue onto the center of the plate and sprinkle silver glitter over it before starting with the yarn. Shake off the excess and let it dry.
Display & Enjoy
Your finished Star of David yarn craft looks great on a door, bulletin board, mantle, or even as a large ornament. It’s simple, pretty, and meaningful—perfect for Hanukkah or any cultural lesson in the classroom.