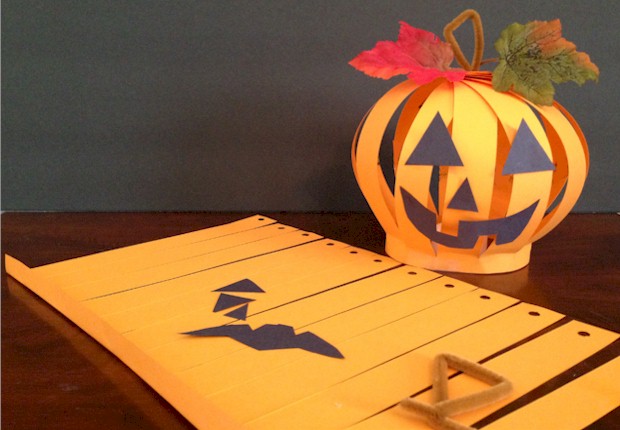
This is a cute craft for older children (ages 8 – 10) as it takes a little bit of skill to measure, cut and assemble the Paper Jack O Lantern Craft. The idea is similar to a Chinese Paper Lantern, where you cut strips of paper to form the lantern shape. The main difference is that one end of the paper strips are gathered at the top to give the pumpkin shape. To give your pumpkins a nighttime glow, place the Jack O ‘Lantern over a battery operated light.

[AFK_02]
Supplies Needed
- Orange construction paper – in this example, I used 8.5″ x 11″ paper.
- Scraps of black construction paper
- Ruler
- Scissors
- Hole punch
- Craft glue
- Scotch Tape
- Brown pipe cleaner cut in half
- Fall leaves for decorating
- Battery operated light
[AFK_02]
Start by drawing a line 1/2 inch up on the long edge of the paper. This will create the base of the pumpkin and mark the stopping point for cutting the paper into strips. Fold the 1/2 inch base as shown.
Perpendicular to the line just drawn, start drawing lines that are 1″ apart to the edge of the paper. Cut these 1″ strips of paper apart being careful not to cut beyond the 1/2″ base.

Punch a hole about 1/4″ down on each of the loose ends of the 1″ strips of paper.
Fold the 1/2 piece of pipe cleaner to form the stem of the pumpkin. Twist the ends of the pipe cleaner together.
Curl the base and attach the two ends together with a piece of scotch tape.
Bring the strips of paper together to form the top of the pumpkin and slide the twisted ends of the pipe cleaner through the punched holes. Bend the ends of the pipe cleaner inside the pumpkin to hold the stem in place.
Cut the jack-o-lantern face pieces (eyes, nose, mouth) out of the black construction paper. Attach each piece to one of the strips of paper to form a face.
Add a battery operated light and your Paper Jack O’ Lantern is complete!
