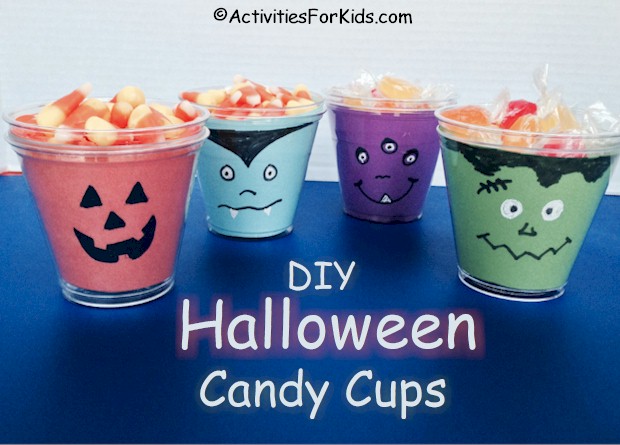
For giving out treats, Halloween Candy Cups are a great idea for a classroom Halloween party. Make it fun and colorful by using different colors of paper for Halloween characters. Blue for Dracula, Orange for a pumpkin, Green for Frankenstein and Purple for a monster face.

[AFK_02]
For younger, pre-school children, parents or teachers can decorate the cups. Otherwise children grade 2 and up should have fun decorating these Halloween candy cups themselves. Children can be creative using markers to draw the faces. In addition to a black marker, I also used a white-out pen. This PDF template fits with most clear solo brand cups.
How to Make Halloween Party Cups
Supplies needed:
- 2 Solo Brand 9oz clear plastic cups for each candy cup
- pencil
- Black permanent marker
- White-out pen
- Scissors
- Printer paper – white or different colors if available
- Construction paper – if not using colored printer paper
- Cup insert template
- Candy and treats to include in the cups

[AFK_02]
Putting Them Together:
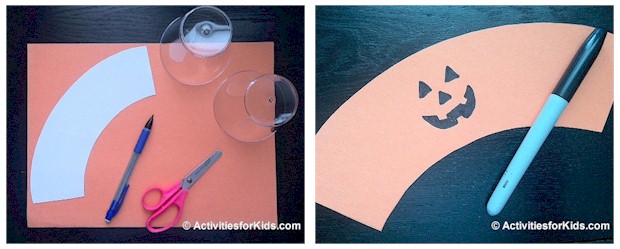
- Print out the Cup insert template and then cut it out. If you are not using colored printer paper, trace the cut-out template onto construction paper in the color of your choice and cut it out. You do not need the circle that is included, unless you wish to make a top for the cup. Do a practice run before giving the project to a group of children. Make sure the template fits with the 9 oz clear cup that you are using.
- Draw a face on the paper somewhere near the center (as shown.) It is best to first draw with a pencil then trace with a marker.
- Place the paper into one of the Solo plastic cups.
- Insert a second Solo cup into the first so that the paper is in between the two cups. To make the cups more secure, put a dot of glue (glue gun works best) into the bottom of the first cup so that the cups stay together. A piece of scotch tape can also be used to hold the paper in place.
- Fill the cups with Halloween treats. Have fun!
