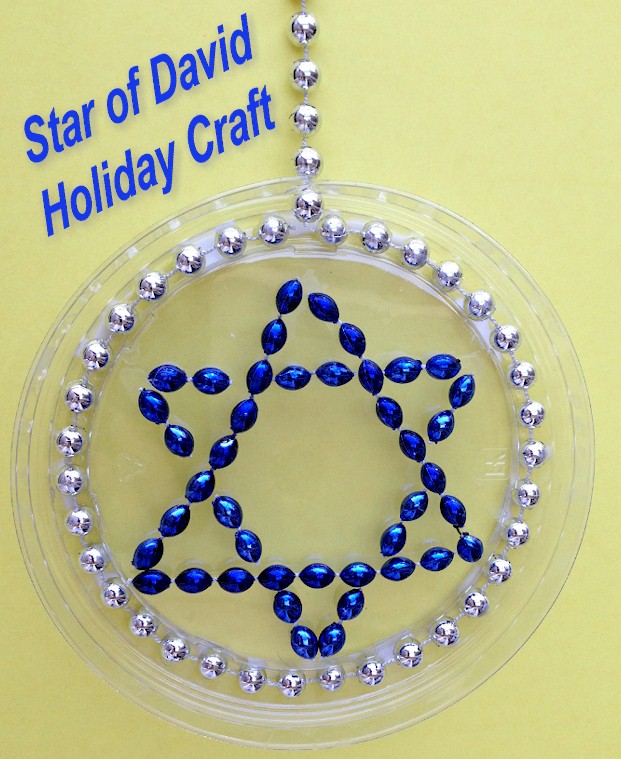
For Hanukkah this year, I created this Star of David craft for kids to make. This craft uses the traditional Hanukkah colors of blue, silver and white. I wasn’t sure of the origins of these colors, so I researched How Blue and White Became the Colors of Hanukkah.
This craft uses Mardi Gras beads of blue and silver to create this shimmering Star of David. The star is attached to a clear plastic lid and can be hung in a window as a suncatcher or to decorate for the holiday.

[AFK_02]
Supplies Needed
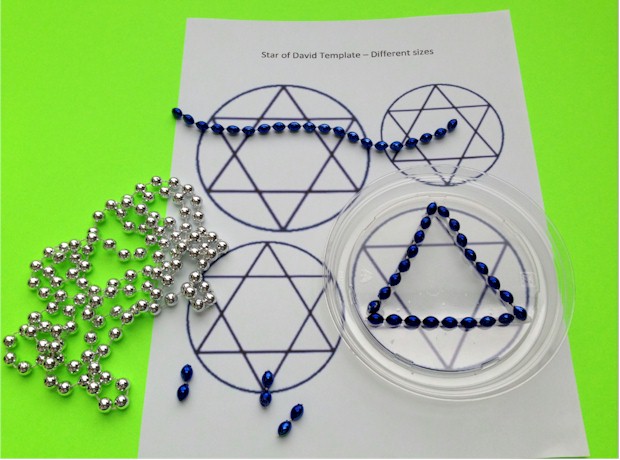
- Select the provided PDF for the Star of David Template. This printout has 4 different sizes of stars.
- White printer paper
- Craft glue
- Scissors
- Blue and silver Mardi Gras beads
- Clear plastic lid. For this example, I used the lid from a 32 oz yogurt container.
Assembling the Star of David
Begin by selecting and printing out the PDF for the Star of David Template on the white printer paper.
There are four different sizes of star on the printout. Select the star that best matches the size of the clear plastic lid that you are using.
Cut the blue Mardi Gras beads to match the length of one of the triangle sides. Repeat this for the other two sides.

[AFK_02]
With the clear plastic lid positioned over one of the stars on the printout, trace all three sides of one of the triangles using a line of glue. Attach the 3 cut pieces of Mardi Gras beads.
The rest of the star will use shorter sections of beads. Note that the bead strands do not bend and will therefore need to be cut for each section of the star. I cut two beads for each of the remaining sections.
Once again, trace the remainder of the star’s outline with the glue and attach the cut sections of beads to complete the Star of David.
Next, add a line of glue along the edge of the plastic lid and attach the silver beads in a circle.
Finally, once the glue has dried, make a small snip at one section of the edge of the lid and add a short section of silver beads to create a hanger for this Star of David Craft.
Here you can find more Hanukkah Crafts and Activities for Kids.
