Whimsical Yarn Easter Eggs:
A Simple DIY That’s Egg-stra Special
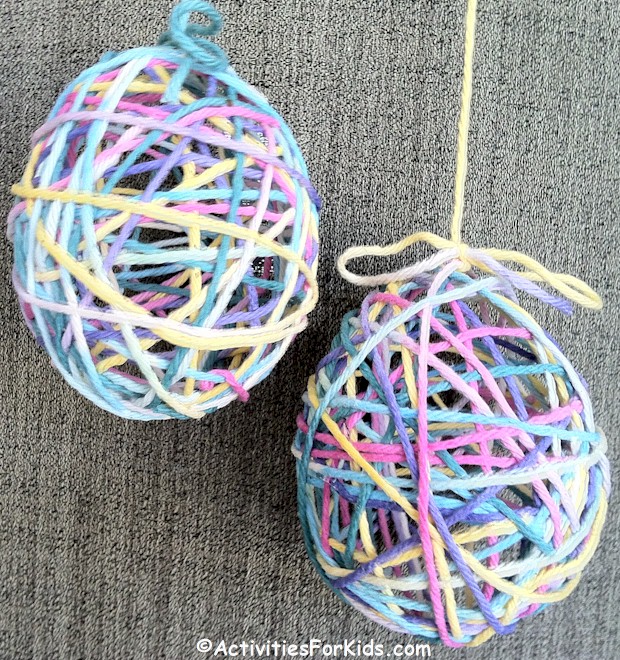
Looking for a cheerful little craft to brighten up your Easter décor? These yarn Easter eggs are a colorful, budget-friendly way to add some handmade charm to your spring setup. They’re perfect as a family activity for younger kids (just expect a little gluey chaos), and totally doable solo for tweens and teens.

If you’ve browsed the internet lately, you’ve probably seen a dozen different ways to make yarn eggs. I went with the good ol’ diluted glue method—because unlike spray starch, school glue is something I always have on hand. Plus, it’s fun to squish.
Why yarn, you ask? Well, for tiny hands, yarn is easier to handle than slippery embroidery thread. And, as luck would have it, I had a pastel-variegated skein just sitting there begging to be turned into something cute. Yarn also tends to be cheaper and more forgiving than its fancy floss cousin. Win-win!
Best of all? These crafty little eggs cost less than a quarter each. With a bottle of glue and a dollar store bag of water balloons, you’re pretty much set. No need to raid the craft store (though you can if you want an excuse).
What You’ll Need to Make Yarn Easter Eggs
No strict measurements here—just estimate based on how many eggs you want to make. The glue-water mix is a simple 50/50 combo. Around 2 tablespoons of each is perfect for one small egg.
Supplies
- Cotton yarn or embroidery thread (pastels = peak Easter vibes).
- Small balloons (water balloons work great!)
- White school glue
- Water
- Bowl or container for mixing glue
- A stick (chopstick, skewer, or popsicle stick)
- Newspaper (for mess control)
- Wax paper (for drying)
How to Make Yarn Easter Eggs
- Prep your workspace
Cover your table with newspaper. Lay out a sheet of wax paper where your eggs can dry without sticking. - Inflate your balloons
Blow them up until they’re about 3–4 inches long. Think “egg-sized,” not “party balloon.” - Mix the glue
Combine equal parts school glue and water in a bowl. Stir it up until it’s smooth and ready for yarn dunking. - Soak the yarn
Don’t cut the yarn—leave it as one long piece. For each egg, you’ll use about a yard. Dip a 12-inch section into the glue mix and let it soak up the goodness. Use your stick to stir and coat it evenly. - Wrap the balloon
Gently squeeze out any excess glue from the yarn, then start wrapping it around the balloon. As one section goes on, pop the next into the glue bowl to soak. - Keep wrapping
Continue this soak-and-wrap routine until your egg is as swirly and full as you like. Light wrap? Delicate and airy. Heavy wrap? Bold and cozy. - Dry time
Set your wrapped balloon on the wax paper and let it dry completely—this takes about 3 to 4 days. Yes, patience is part of the charm. - Pop and peel
Once it’s fully hardened, gently pop the balloon and pull it out. Ta-da! A lovely little yarn egg.
Add a Little Extra Sparkle
- Glitter bomb: Sprinkle glitter or confetti on the wet yarn for a little dazzle.
- Basket vibes: Display your eggs in a cute basket as an Easter centerpiece.
- Hang time: Tie a string and hang them from branches for a floating egg display that screams “Pinterest-worthy.”
These DIY yarn Easter eggs are a playful blend of art and mess, tradition and whimsy. Whether you’re crafting with kids, teens, or just embracing your inner child, it’s a fun way to celebrate the season. Now hop to it—and don’t forget to share your creations!